Installation
My Software Version:
- Python 3.6.3 :: Anaconda custom (64-bit)
- Windows 10
First, make sure you have the below packages already installed with Python bindings:
- CMake - use
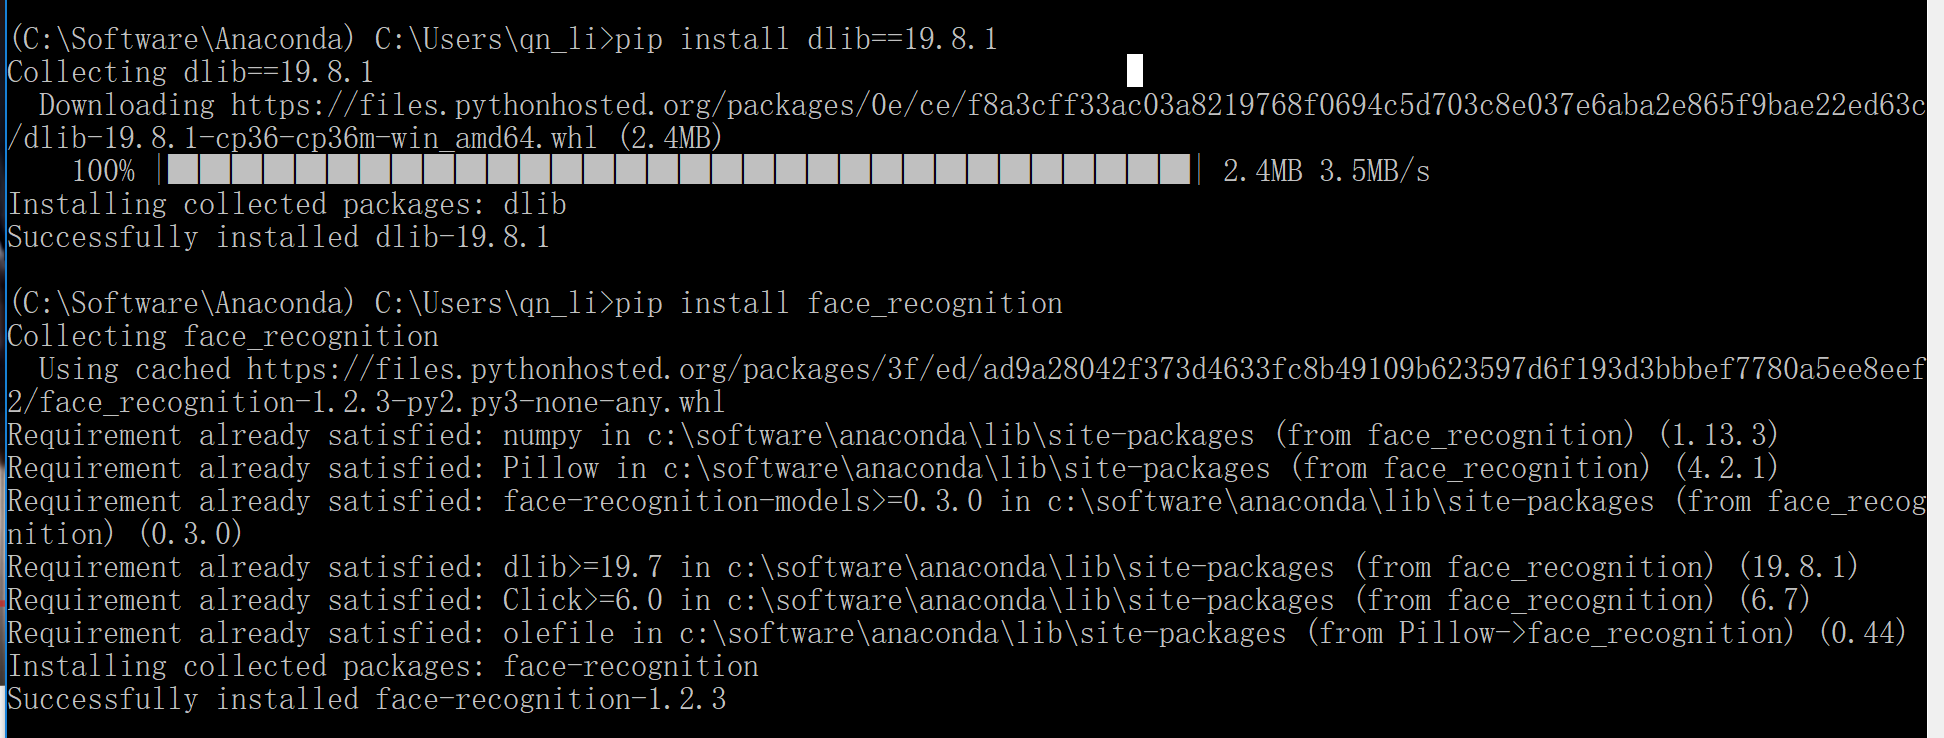
pip install CMaketo install it - dlib - Windows may have problems automatically installing the newest version, so you can specify the version and
use
pip install dlib==19.8.1

Then, pip install face_recognition and pip install opencv-python
Usage
Command-Line Interface
When you install face_recognition, you get two simple command-line programs:
face_recognition - Recognize faces in a photograph or folder full for photographs.
face_detection - Find faces in a photograph or folder full for photographs.
Python Code
Makeup on pictures
from PIL import Image, ImageDraw
import face_recognition

# Load the jpg file into a numpy array
image = face_recognition.load_image_file("two_people.jpg")

# Find all facial features in all the faces in the image
face_landmarks_list = face_recognition.face_landmarks(image)

pil_image = Image.fromarray(image)
for face_landmarks in face_landmarks_list:
    d = ImageDraw.Draw(pil_image, 'RGBA')

    # Make the eyebrows into a nightmare
    d.polygon(face_landmarks['left_eyebrow'], fill=(68, 54, 39, 128))
    d.polygon(face_landmarks['right_eyebrow'], fill=(68, 54, 39, 128))
    d.line(face_landmarks['left_eyebrow'], fill=(68, 54, 39, 150), width=5)
    d.line(face_landmarks['right_eyebrow'], fill=(68, 54, 39, 150), width=5)

    # Gloss the lips
    d.polygon(face_landmarks['top_lip'], fill=(250, 0, 0, 128))
    d.polygon(face_landmarks['bottom_lip'], fill=(250, 0, 0, 128))
    d.line(face_landmarks['top_lip'], fill=(150, 0, 0, 64), width=8)
    d.line(face_landmarks['bottom_lip'], fill=(150, 0, 0, 64), width=8)

    # Sparkle the eyes
    d.polygon(face_landmarks['left_eye'], fill=(255, 255, 255, 30))
    d.polygon(face_landmarks['right_eye'], fill=(255, 255, 255, 30))

    # Apply some eyeliner
    d.line(face_landmarks['left_eye'] + [face_landmarks['left_eye'][0]], fill=(0, 0, 0, 110), width=1)
    d.line(face_landmarks['right_eye'] + [face_landmarks['right_eye'][0]], fill=(0, 0, 0, 110), width=1)

pil_image.show()

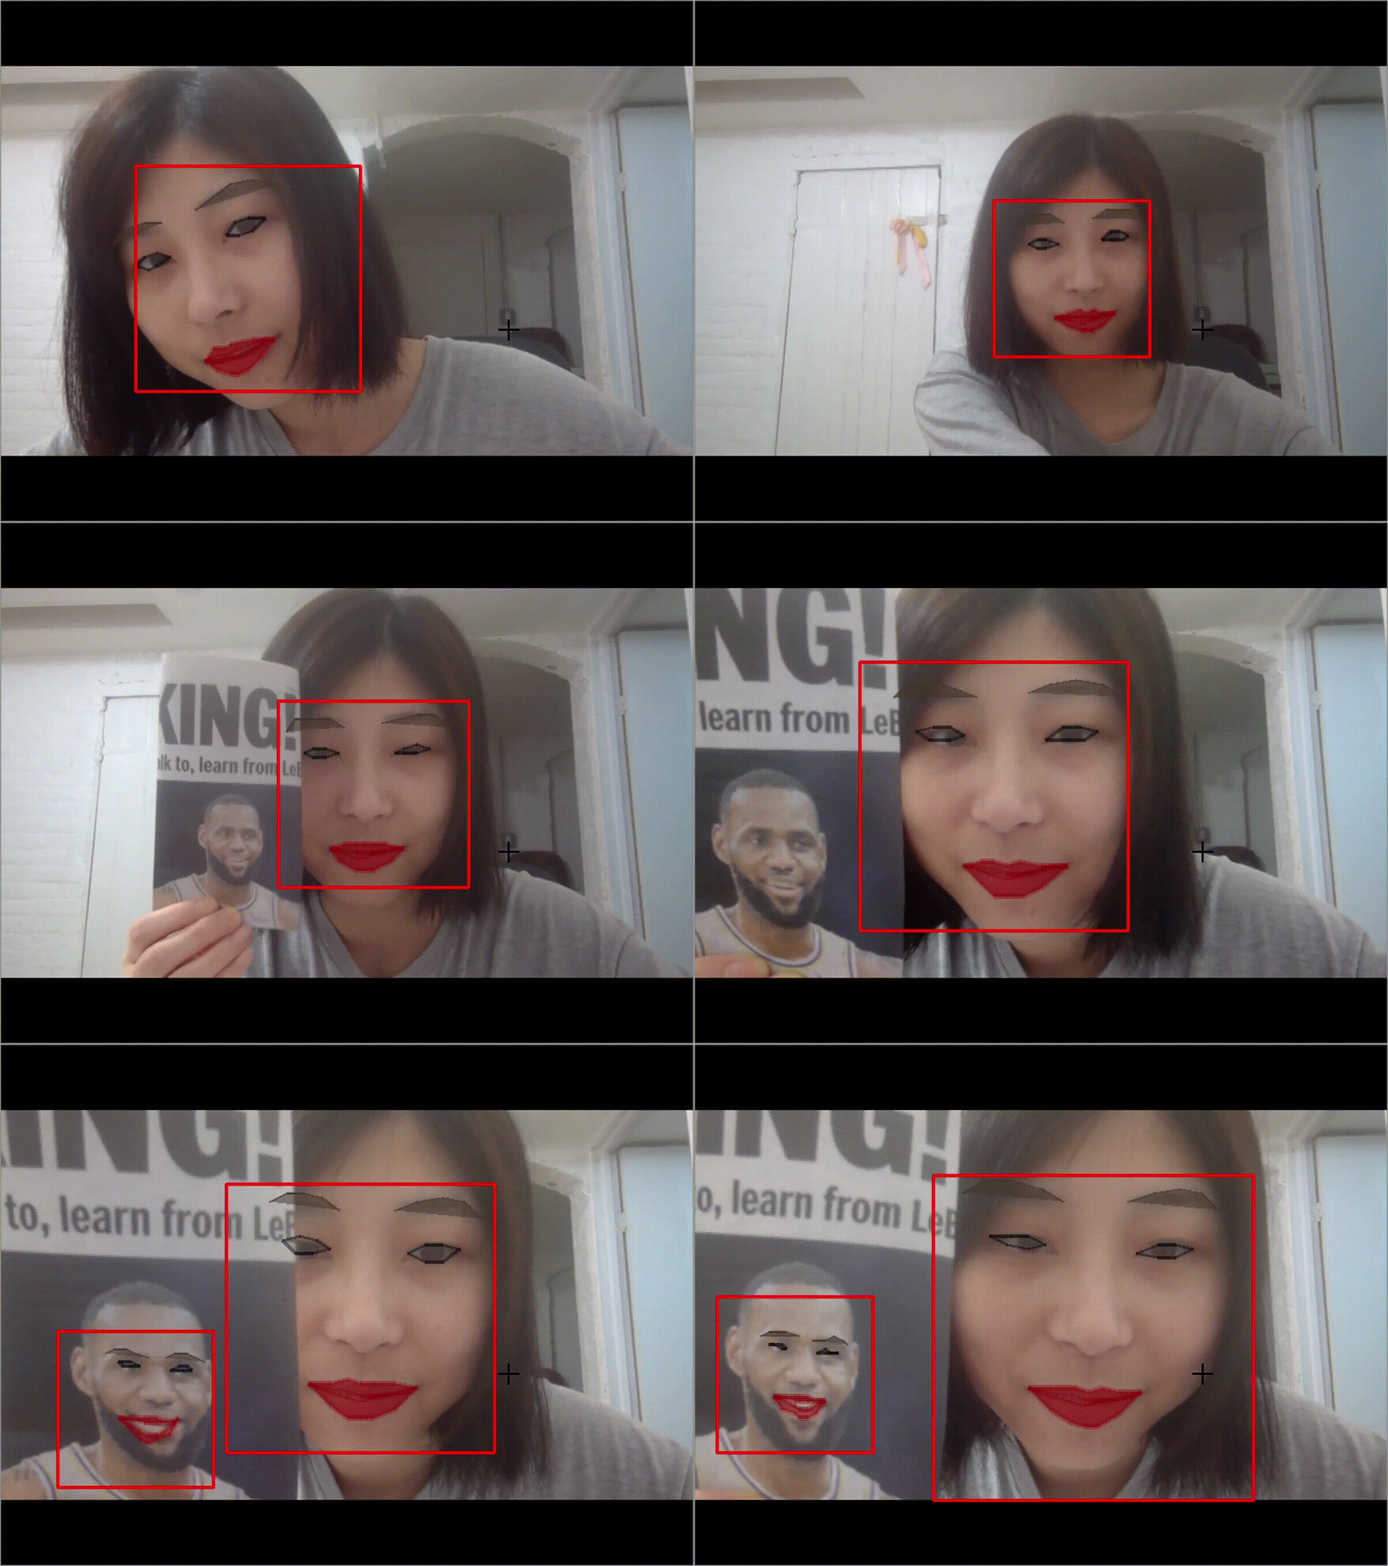
Real-Time Makeup - using the webcam
from PIL import Image, ImageDraw
import face_recognition
import cv2
import numpy as np

# Convert a PIL/Pillow image to a numpy array
def PIL_to_Array(img):
    return np.array(img.getdata(),
                    np.uint8).reshape(img.size[1], img.size[0], 3)

def up_sample(landmark_list , sample_size=4):
    for face_landmark in landmark_list:
        if len(face_landmark) > 1:
            for key in face_landmark.keys():
                face_landmark[key] = [(w[0]*sample_size , w[1]*sample_size) for w in face_landmark[key]]
    return landmark_list

# Get a reference to webcam #0 (the default one)
video_capture = cv2.VideoCapture(0)
#video_capture.set(cv2.CAP_PROP_FRAME_WIDTH, 1300)
#video_capture.set(cv2.CAP_PROP_FRAME_HEIGHT, 800)

face_locations = []
process_this_frame = True

while True:
    # Grab a single frame of video
    ret, frame = video_capture.read()

    # Resize frame of video to 1/4 size for faster face recognition processing
    small_frame = cv2.resize(frame, (0, 0), fx=0.25, fy=0.25)

    # Convert the image from BGR color (which OpenCV uses) to RGB color (which face_recognition uses)
    rgb_small_frame = small_frame[:, :, ::-1]

    # Only process every other frame of video to save time
    if process_this_frame:
        # Find all the faces and face encodings in the current frame of video
        face_locations = face_recognition.face_locations(rgb_small_frame)

    process_this_frame = not process_this_frame

    face_landmarks_list = face_recognition.face_landmarks(small_frame)

    face_landmarks_list= up_sample(face_landmarks_list)

    pil_image = Image.fromarray(frame)
    for face_landmarks in face_landmarks_list:
        d = ImageDraw.Draw(pil_image, 'RGBA')

        # Make the eyebrows into a nightmare
        d.polygon(face_landmarks['left_eyebrow'], fill=(39, 54, 68, 128))
        d.polygon(face_landmarks['right_eyebrow'], fill=(39, 54, 68, 128))
        d.line(face_landmarks['left_eyebrow'], fill=(39, 54, 68, 150), width=2)
        d.line(face_landmarks['right_eyebrow'], fill=(39, 54, 68, 150), width=2)

        # Gloss the lips
        d.polygon(face_landmarks['top_lip'], fill=(0, 0, 150, 128))
        d.polygon(face_landmarks['bottom_lip'], fill=(0, 0, 150, 128))
        d.line(face_landmarks['top_lip'], fill=(0, 0, 150, 64), width=5)
        d.line(face_landmarks['bottom_lip'], fill=(0, 0, 150, 64), width=5)

        # Sparkle the eyes
        d.polygon(face_landmarks['left_eye'], fill=(0, 0, 0, 30))
        d.polygon(face_landmarks['right_eye'], fill=(0, 0, 0, 30))

        # Apply some eyeliner
        d.line(face_landmarks['left_eye'] + [face_landmarks['left_eye'][0]], fill=(0, 0, 0, 110), width= 3)
        d.line(face_landmarks['right_eye'] + [face_landmarks['right_eye'][0]], fill=(0, 0, 0, 110), width= 3)

    # Display the results
    frame = PIL_to_Array(pil_image)

    for (top, right, bottom, left) in face_locations:
        # Scale back up face locations since the frame we detected in was scaled to 1/4 size
        top *= 4
        right *= 4
        bottom *= 4
        left *= 4
        # Draw a box around the face
        cv2.rectangle(frame, (left, top), (right, bottom), (0, 0, 255), 2)

    # Display the resulting image
    cv2.imshow('Video', frame)

    # Hit 'q' on the keyboard to quit!
    if cv2.waitKey(1) & 0xFF == ord('q'):
        break

# Release handle to the webcam
video_capture.release()
cv2.destroyAllWindows()
Please note: OpenCV process the image using BGR color while pictures using RGB color code, thus we must change
the color code from ...fill=(0, 0, 150, 128) to fill=(150, 0, 0, 64) to represent the red color.
